Thursday 30 March 2023

Going Live Update 30/3/23

 Going Live Update                                                                                                                                         30/3/23

Figure 1: Tweenies dance cycle: http://aproductionsltd.blogspot.com/2012/03/dance-cycle.html

After some misadventures with the referencing and rig of the Tinny model I've got to the stage where I can animate him relatively fluently.  His feet still aren't perfect and I definitely don't think I could do a standard walk cycle with the model considering the toe placement would ruin it.  I've been searching for an animation cycle that I could follow where the character is in place but there is still enough body language to make it interesting.  I considered doing a floss dance cycle but that result in the animation feeling dated and rote.  I have done a rough floss dance before but I wanted to try something more original.  I've tried doing a relatively simple animation where the hips on Tinny swivel from left to right but I will probably need to find a tutorial on how to make this look fluent and professional.  I've also found a reference from the Tweenies for a dance cycle which looks like it could easily appeal to a young audience.  However the dance was definitely designed for a character with the limbic capability of someone like Tinny so, it's going to look a bit awkward and not as good when Fizz does it.  Given the time we have left I might have to just settle for a simple wave animation but hopefully I can give Wild Child something more inventive.
Figure 2: Floss dance animation cycle:https://www.google.com/url?sa=i&url=https%3A%2F%2Ffreesvg.org%2F1544290622&psig=AOvVaw3smbsK18VyE8j0WwS9cd1_&ust=1680272746160000&source=images&cd=vfe&ved=0CA8QjRxqFwoTCNCSmfPtg_4CFQAAAAAdAAAAABAE


Figure 3: Maya animation attempts with Nikko


Tuesday 28 March 2023

Going Live Update 28/03/23

 Going Live Update                                                                                                                                    28/03/23

Figure 1: Bad Maya Graph: https://www.google.com/url?sa=i&url=https%3A%2F%2Fforums.autodesk.com%2Ft5%2Fmaya-animation-and-rigging%2Fanimation-breaks-after-switching-from-stepped-to-spline-in-graph%2Ftd-p%2F10947551&psig=AOvVaw19k-RNOrNKjX_z1YHdkpyG&ust=1680099255166000&source=images&cd=vfe&ved=0CA8QjRxqFwoTCMjarMzn_v0CFQAAAAAdAAAAABAI

Too much of anything is ultimately a bad thing.  This is the lesson I've learned from the most recent session I've had with Maya when modifying the graph editor.  Apart from the main takeaway from the tutor stating that footwork pushing forward across the plane is better suited for a linear tangent, I'm not entirely sure what to do next with the Nikko animation in Maya.  I'm worried if I modifying the animation too much, it'll just result in a repeat of what happened on 23rd March where the animation on the footwork made the whole thing fall apart.  I'll have to playblast the footage to see how the animation looks to my fellow colleagues.  The tricky part will be when it comes time to make the figure move across the plane, since the model can still look it's sliding from a distance.  

Figure 2: Maya body mesh falling apart: https://www.google.com/url?sa=i&url=https%3A%2F%2Fwww.reddit.com%2Fr%2FMaya%2Fcomments%2Fkppmpf%2Fbody_mesh_is_ripping_apart_at_the_vertices_unsure%2F&psig=AOvVaw2qk4XzjelhfFARuxKLEYD0&ust=1680099555543000&source=images&cd=vfe&ved=0CA8QjRxqFwoTCLiTx9vo_v0CFQAAAAAdAAAAABAE

Figure 3: Tom double bounce walkcycle: https://www.youtube.com/watch?v=AGrrRw93G00

This animation is a target for what I'm aiming for when it comes to moving the character forward in 3D space.  I'm not bothered about the arm movement or the waistline for the figure but on how it cleanly moves forward across the floorplan without any sliding.  It's not the most professional looking animation in the world and arguably moves a bit too quickly for my liking, but in terms of necessary ground friction and movement correlation, this is the best I can hope for when I give the finished results to my colleagues to go into Unreal.  This will take a lot of tweaking and I won't save the model unless it's a position I'm comfortable with.  


Figures 3 and 4: Latest Nikko double bounce tests

These are the latest double bounce walk cycle tests that I've done in Maya with the Nikko model including one where there are linear tangents on the footwork to adhere to the tutor's recommendation.  I've done minimal changes with the footwork otherwise to make sure that they can be easily switched back to spline tangents if something goes wrong.  Thankfully so far, I've seen minimal obstruction to the animation flow, but I am proceeding very carefully in case something disastrous happens again.

Figure 5: Double bounce walkcycle compilation


Sunday 26 March 2023

Assessment video bibliography 26/03/23

  •  Assessment video bibliography                                                                                                               26/03/23
  • Figure 1: Bibliography example: https://www.google.com/url?sa=i&url=https%3A%2F%2Fwww.scribbr.co.uk%2Freferencing%2Fharvard-bibliography%2F&psig=AOvVaw0TELFLLy9-wUvV05AfeZyb&ust=1679945113342000&source=images&cd=vfe&ved=0CA8QjRxqFwoTCNiw16-p-v0CFQAAAAAdAAAAABAE


  • Murray, G. (1966) Camberwick Green. London: BBC1.

    Rotoscoping practice (2020) YouTube. YouTube. Available at: https://www.youtube.com/watch?v=gT08AmeIcFc (Accessed: April 4, 2023).

    STRUT" animated walkcycle (2012) YouTube. YouTube. Available at: https://www.youtube.com/watch?v=EMnOnpzFcZc (Accessed: March 26, 2023).

    ·           STRUT" animated walkcycle (2012) YouTube. YouTube. Available at: https://www.youtube.com/watch?v=EMnOnpzFcZc (Accessed: March 26, 2023).

    ·         Double bounce walk cycle - Fallout Scout (2016) YouTube. YouTube. Available at: https://www.youtube.com/watch?v=gtuPie0obEU (Accessed: March 26, 2023).

    ·         Double bounce walk cycle - Fallout Scout (2016) YouTube. YouTube. Available at: https://www.youtube.com/watch?v=gtuPie0obEU (Accessed: March 26, 2023).

    ·         Eschbacher, R. and Webber, H. (2017) “Dorothy and the Wizard of Oz.” Atlanta, Georgia: Boomerang.

    ·         Eschbacher, R. and Webber, H. (2017) “Dorothy and the Wizard of Oz.” Atlanta, Georgia: Boomerang.

    ·         Geller, M. (2015) Photoshop tutorial: How to transform photos into gorgeous, pencil drawings, YouTube. YouTube. Available at: https://www.youtube.com/watch?v=UAz3pdvm3JU (Accessed: March 26, 2023).

    ·         Geller, M. (2015) Photoshop tutorial: How to transform photos into gorgeous, pencil drawings, YouTube. YouTube. Available at: https://www.youtube.com/watch?v=UAz3pdvm3JU (Accessed: March 26, 2023).

    ·         Legends of Oz - Dorothy's Return (2014). United States: Clarius Entertainment.

    ·         Legends of Oz - Dorothy's Return (2014). United States: Clarius Entertainment.

    ·         Lightness – Nomyn (no copyright music) (2018) YouTube. YouTube. Available at: https://www.youtube.com/watch?v=yTIFnD_iAyM (Accessed: March 26, 2023).

    ·         Lightness – Nomyn (no copyright music) (2018) YouTube. YouTube. Available at: https://www.youtube.com/watch?v=yTIFnD_iAyM (Accessed: March 26, 2023).

    ·         Maya Animation Tutorials - Double Bounce Walk Cycle (2021) YouTube. YouTube. Available at: https://www.youtube.com/watch?v=uTk3PYTTrJw&t=1s (Accessed: March 26, 2023).

    ·         Maya Animation Tutorials - Double Bounce Walk Cycle (2021) YouTube. YouTube. Available at: https://www.youtube.com/watch?v=uTk3PYTTrJw&t=1s (Accessed: March 26, 2023).

    ·         Maya Basic Animation Tutorials - Walk Cycle | A Step by Step Guide (2020) YouTube. YouTube. Available at: https://www.youtube.com/watch?v=jiI4vWjR2Fc (Accessed: March 22, 2023).

    ·         Maya Basic Animation Tutorials - Walk Cycle | A Step by Step Guide (2020) YouTube. YouTube. Available at: https://www.youtube.com/watch?v=jiI4vWjR2Fc (Accessed: March 22, 2023).

    ·         Mizuki - Bad Snacks (2021) YouTube. YouTube. Available at: https://www.youtube.com/watch?v=MysaDdA_VVY (Accessed: March 26, 2023).

    ·         Mizuki - Bad Snacks (2021) YouTube. YouTube. Available at: https://www.youtube.com/watch?v=MysaDdA_VVY (Accessed: March 26, 2023).

    ·         Mowgli Double Bounce Walk (2021) YouTube. YouTube. Available at: https://www.youtube.com/watch?v=sn4DzdyVuB4 (Accessed: March 26, 2023).

    ·         Mowgli Double Bounce Walk (2021) YouTube. YouTube. Available at: https://www.youtube.com/watch?v=sn4DzdyVuB4 (Accessed: March 26, 2023).

    ·         Munchkinland - B backdrop rentals (no date) TheatreWorld® Backdrops. TheatreWorld Backdrops. Available at: https://www.theatreworldbackdrops.com/backdrops/munchkinland-b-007-00580 (Accessed: March 30, 2023).

    ·         Munchkinland - B backdrop rentals (no date) TheatreWorld® Backdrops. TheatreWorld Backdrops. Available at: https://www.theatreworldbackdrops.com/backdrops/munchkinland-b-007-00580 (Accessed: March 30, 2023).

    ·         O-man.  2017.  Sun Melt Waves.  Cool Wet Sand.  [Medium]  Stockholm.  Epidemic Sound.

    ·         O-man.  2017.  Sun Melt Waves.  Cool Wet Sand.  [Medium]  Stockholm.  Epidemic Sound.

    ·         Rincon, J.C. (2017) Hare Strut (walk cycle), YouTube. YouTube. Available at: https://www.youtube.com/watch?v=HEL6hfPPpeA (Accessed: March 26, 2023).

    ·         Rincon, J.C. (2017) Hare Strut (walk cycle), YouTube. YouTube. Available at: https://www.youtube.com/watch?v=HEL6hfPPpeA (Accessed: March 26, 2023).

    ·         Singh, J. (2021) Tom Double bounce walk cycle, YouTube. YouTube. Available at: https://www.youtube.com/watch?v=AGrrRw93G00 (Accessed: March 26, 2023).

    ·         Singh, J. (2021) Tom Double bounce walk cycle, YouTube. YouTube. Available at: https://www.youtube.com/watch?v=AGrrRw93G00 (Accessed: March 26, 2023).

    ·         Strut Walk Cycle (2017) YouTube. YouTube. Available at: https://www.youtube.com/watch?v=NQlajgJmIR8 (Accessed: March 26, 2023).

    ·         Strut Walk Cycle (2017) YouTube. YouTube. Available at: https://www.youtube.com/watch?v=NQlajgJmIR8 (Accessed: March 26, 2023).

    ·         Tropical Traveller (2019) YouTube. YouTube. Available at: https://www.youtube.com/watch?v=CuLlbJi02Bg (Accessed: March 26, 2023).

    ·         Tropical Traveller (2019) YouTube. YouTube. Available at: https://www.youtube.com/watch?v=CuLlbJi02Bg (Accessed: March 26, 2023).

    ·         Wild child animation showreel 2021 (2023) Vimeo. Wild Child. Available at: https://vimeo.com/521325617 (Accessed: March 26, 2023).

    ·         Wild child animation showreel 2021 (2023) Vimeo. Wild Child. Available at: https://vimeo.com/521325617 (Accessed: March 26, 2023).

    ·         “Timmy Time” (2010). Bristol: Cbeebies.

    ·         “Timmy Time” (2010). Bristol: Cbeebies.

Going Live Project Update 26/03/23

 Going Live Project Update                                                                                                                 26/03/23

Figure 1: Broken rails: https://www.google.com/url?sa=i&url=https%3A%2F%2Fwww.entrepreneur.com%2Fliving%2F3-ways-youre-derailing-your-employees-productivity%2F227432&psig=AOvVaw3TD2BF9oq-EeFoAYPAa_u8&ust=1679941579596000&source=images&cd=vfe&ved=0CA8QjRxqFwoTCOD7gpuc-v0CFQAAAAAdAAAAABAE

The animation phase in my project with Nikko in Maya has hit a bit of a roadblock.  I had found a method of moving the character forward without sliding in Maya, but the problem was that it was a very stop-start flow where it pass through one foot and then stop before proceeding to the next foot.  I know that this can be resolved because I tried a similar approach to the Kayla rig (which was taller and could travel further in a cycle) and I found a way forward that had minimal sliding.  There was some sliding at the mid contact phase but it was minimal.  The problem with the Nikko rig is that his legs are much shorter so they can't travel far.  Unfortunately, during my last session with the double bounce walkcycle on Nikko, everything began to feel like it was falling apart.  The most problematic part of the rigs for both characters seems to be the feet, since they often don't behave as keyframed and Tinny currently has a fault where the toe area of his foot is disjointed for the sole.  The most frustrating part of the session however, came in the afternoon with Nikko's rig where the right leg was out of sync, not performing as keyframed with the foot doing all sorts of unscripted maneuvers, and drawing attention away from the rest of the body.   This was especially irritating for me because I'd spent a great deal of time earlier carefully calculating the exact distance to move the body forward for each increment.  Further complication arose from the fact that the rest of the body had so much animation added that it made redoing the footwork too cumbersome, and so the animation was effectively derailed.  Thankfully I'd managed to do some playblasting of some earlier maneuvers so I had some footage to show Wild Child, but it was still a bit of a trainwreck to behold.  I showed the footage to the tutor to see if it could be resolved, but in the end, I resignedly shrugged my shoulders and decided to start all over again with the updated rig and model, and as of this writing I'm currently at the phase of creating some engaging arm movement.  I also have some feedback from Wild Child to slow the double bounce walk down once the extra down stage has been applied and the graph editor has been modified as necessary.  I am aware that this is not an unheard-of event situation in animation, with stories of entire original animation footage being stolen, but the whole initial animation process in about one day if I stay focused, so I should still be able to produce a decent animation for the pitch scene.  As for Tinny, considering his problems that still need to be ironed out, the best course of action for him going forward would be a simple waving animation, or at the most, a spinning top animation with the head.  I'm going to focus on making Nikko's walkcycle look as good as possible, so I can finish the Wild Child project with pride, and make it a notable CV credit.

Figure 2: Rigged leg in Maya: https://www.google.com/url?sa=i&url=https%3A%2F%2F3dtotal.com%2Ftutorials%2Ft%2Fintroduction-to-rigging-in-maya-the-legs-jahirul-amin&psig=AOvVaw2JFs3kVGLipdRZ86I0Yps4&ust=1679943174220000&source=images&cd=vfe&ved=0CA8QjRxqFwoTCIjugJOi-v0CFQAAAAAdAAAAABAE


Thursday 23 March 2023

Final project "pipeline" 23/03/23

 Final project "pipeline"                                                                                                                               23/03/23

Figure 1: Rough drawing of image resembling pipeline

In preparation for the assessment video that not's actually due in until April 17th but that I'm treating like it's due in on March 31st, I'm prepping the basis of a pipeline illustration, or at least something that resembles how a pipeline is supposed to work.  The pipeline of my project is very different from what an animation pipeline usually is, mainly because professional animations take a lot longer to produce and the fact that what could be considered as the production phase of my work is a lot shorter than the norm.  This is being done mainly to address a criticism from my last assessment video which had a lack of a pipeline explanation of how my project is going to work, so I'm creating a motion graphic to remedy that.  I hope that this motion graphic will give the assessment video the extra points it needs.

Figure 2: Professional animation pipeline: https://animeight.com/2018/02/21/3d-production-pipeline/


Tuesday 21 March 2023

Going Live Update 21/03/23

Going Live Update                                                                                                                         21/03/23
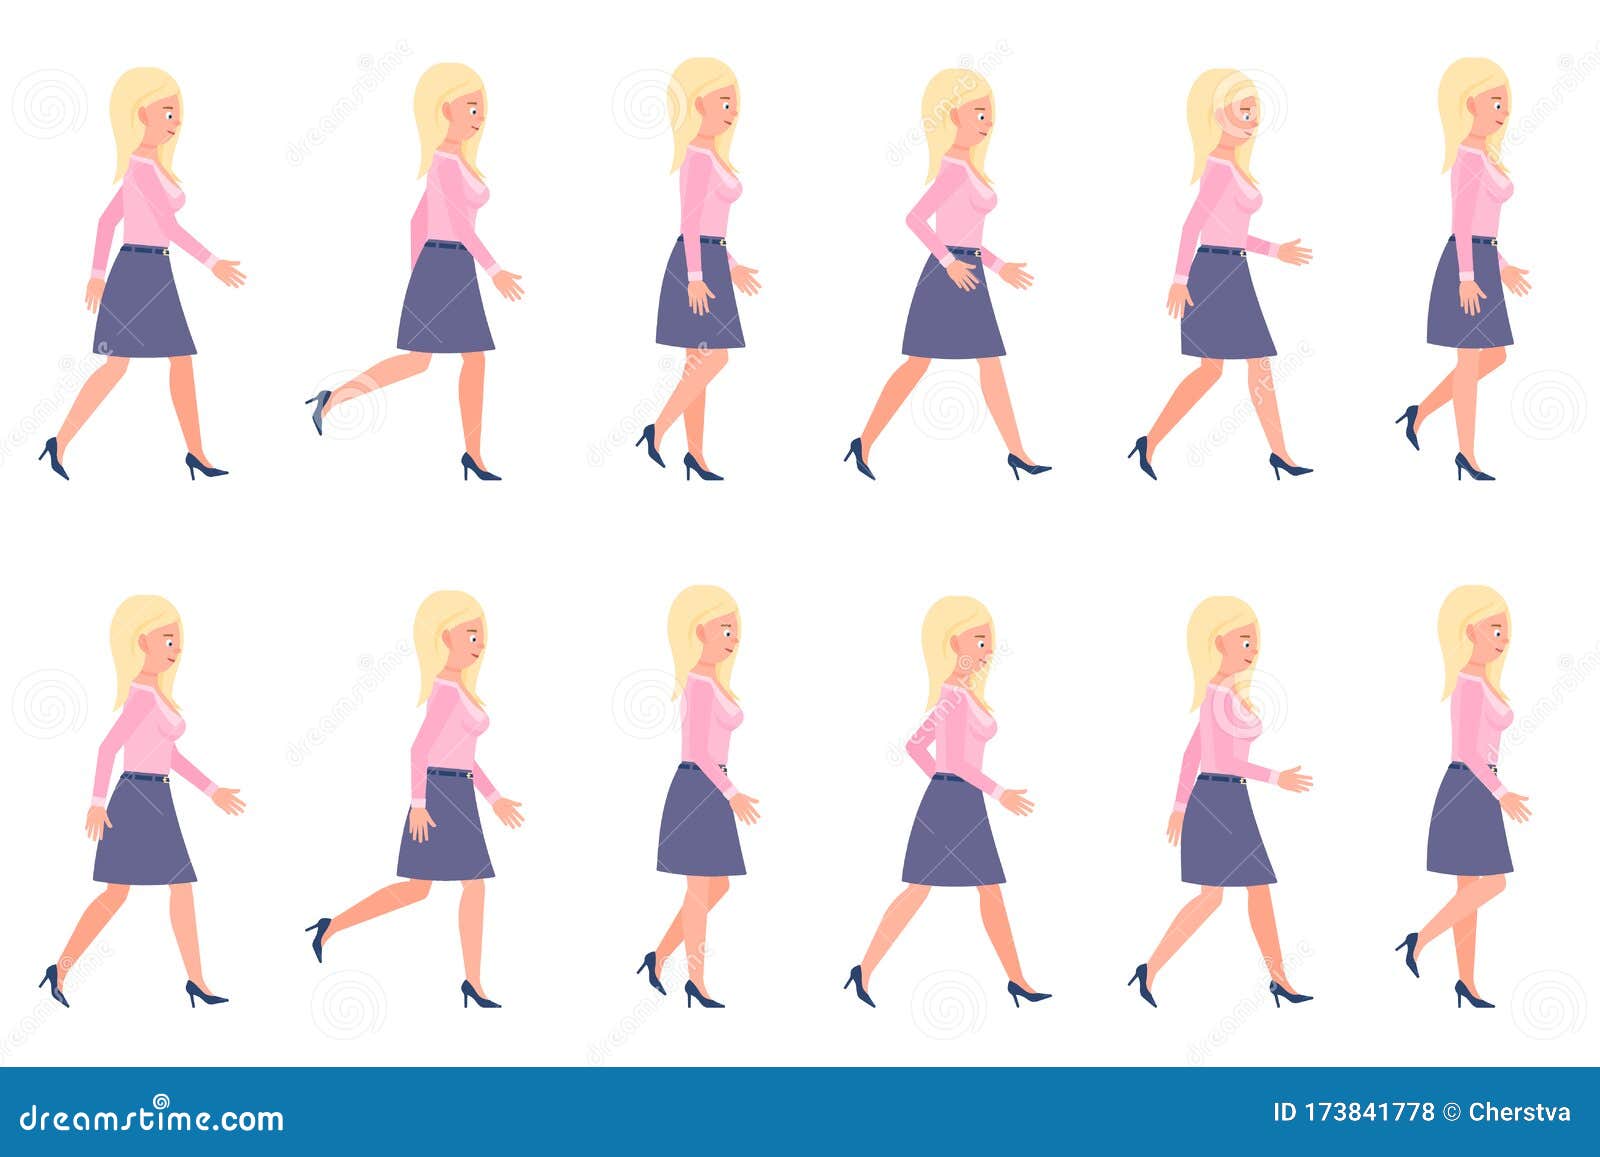
Young, Adult Woman Walking Sequence Poses Vector Illustration. Moving  Forward, Fast, Slow Going Person Cartoon Character Set Stock Vector -  Illustration of character, funny: 173841778 Figure 1: Woman walking forward animation cycle: https://thumbs.dreamstime.com/z/young-adult-woman-walking-sequence-poses-vector-illustration-moving-forward-fast-slow-going-person-cartoon-character-set-white-173841778.jpg

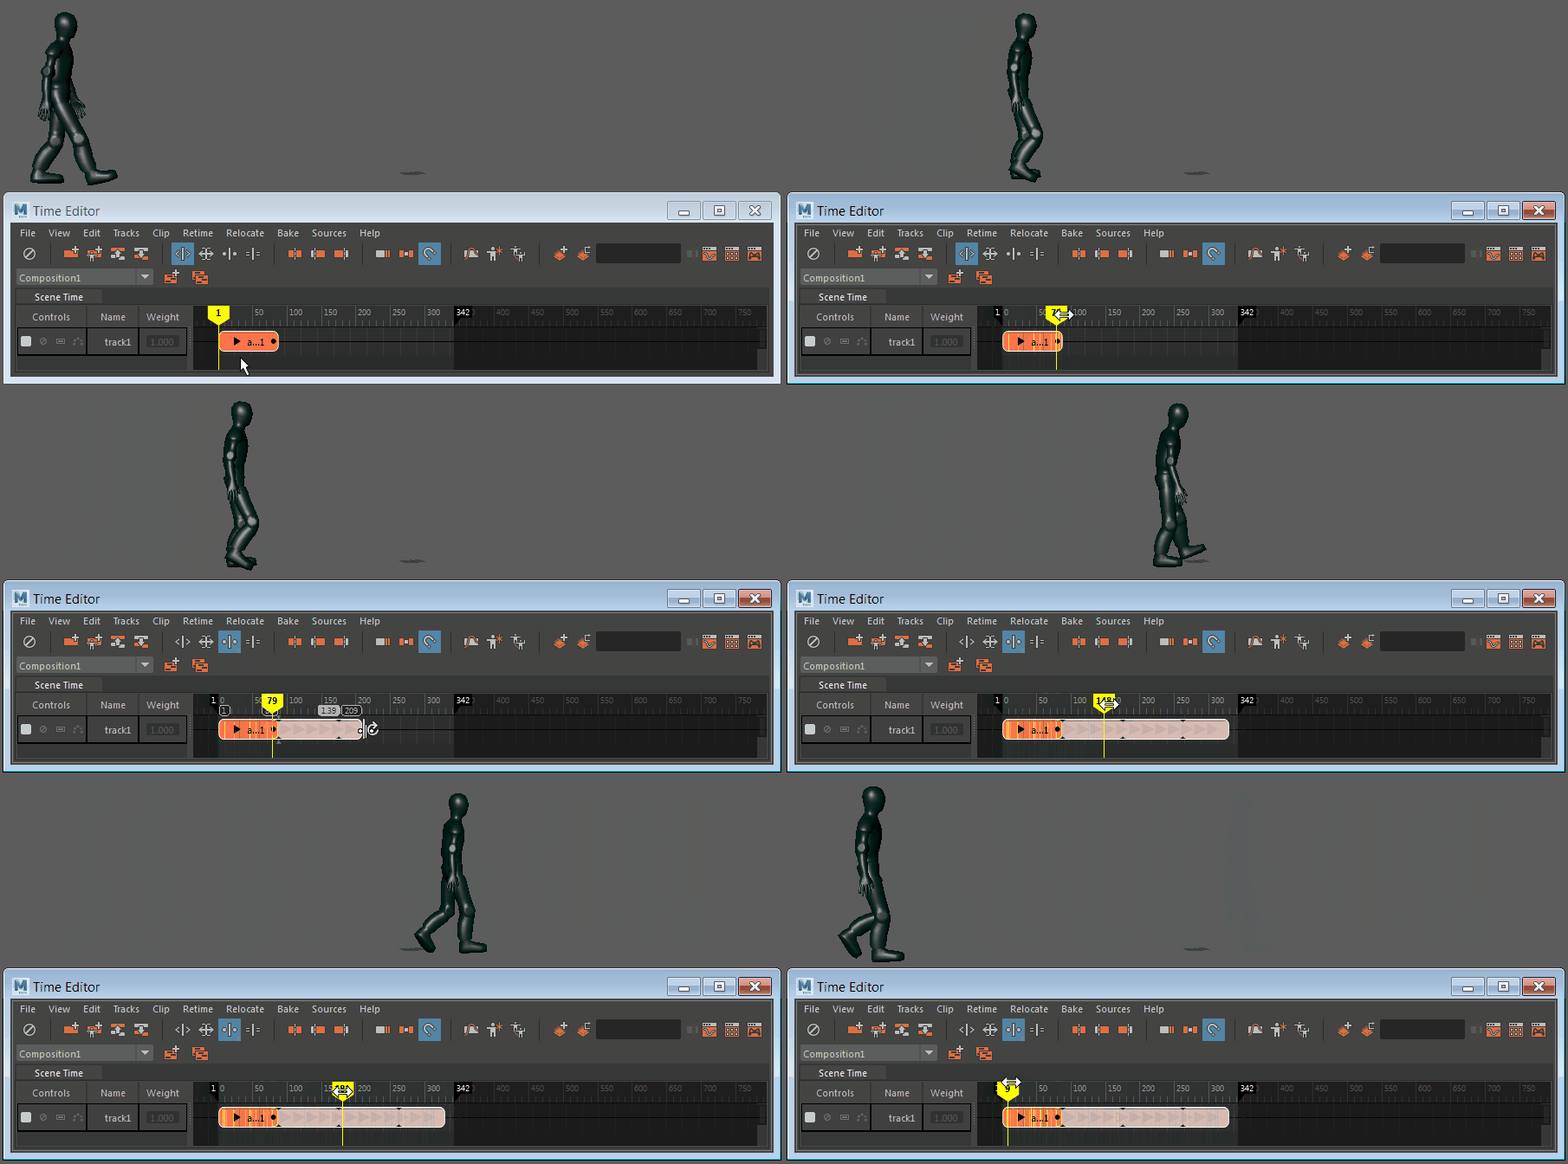
In order to make my animation of Nikko ready for showing to Wild Child, it requires forward movement on the base so that it successfully go from point A to point B on the yellow brick road when imported into the final pitch deck scene.  This is another task that will inevitably involve a lot of trial and error.  Whilst the animation in its current phase is great for a video game, since the character's movement is determined by the player's input, in the context of a film, the character needs to be moving on its own.   The first method that I tried using involved just two keyframes at the start and end points of the animation, using the grid in Maya as a guide, which you can imagine resulted in the figure sliding across the plane and looking incredibly unconvincing.  The second method I tried, which is the more professional method was animating the character in increments where the distance the figure travelled correlates with how much the foot pushes the body forward.  This method was also recommended by the tutor.  Once I perfect the correlation between the body movement and the footwork, I can set the curves to cycle with offset and let the model carry itself the rest of the way, but this will require a infinite deal of fine tuning.  
 Maya Help | Create a walk cycle with Progressive Looping | Autodesk   

Figure 2: Maya walkcycle test with time editor: https://help.autodesk.com/cloudhelp/2023/ENU/Maya-Animation/images/GUID-6879DFC2-6E72-4A6D-A98F-3FAC3609051C.gif

It was mentioned that if the character would need to stop, that stage would require additional animation of the character coming to a halt, which would become difficult when the character is set on a cycle.  The original model has also been updated since I started animating with Nikko, which means the reference will likely need updating.  For the timebeing, I have been advised to stick with the V2 model.  The tin man still has yet to be finished, so I cannot begin animating him just yet.  He is definitely going to be the harder model to animate since his walkcycle, given the movements and lack of adaptability.  My first attempts with the strut walk cycle resulted in a walk cycle with fairly decent leg movement, but the arm movement was gnarly, jerky and unnatural.  I've also learned from this experience that what looks good in 2D may not look good in 3D, particularly from the front and back where you'll need more movement in the knee area and rotating heels.  


Monday 20 March 2023

Advanced Production Update 20/3/23

 Advanced Production Update                                                                                                                  20/3/23

Figure 1: Dundee waterfront: https://www.google.com/url?sa=i&url=https%3A%2F%2Fwww.dundeewaterfront.com%2F&psig=AOvVaw2GMvOGBgweFA-maAmecclv&ust=1679408992381000&source=images&cd=vfe&ved=0CA8QjRxqFwoTCJD0qJXc6v0CFQAAAAAdAAAAABAJ

Figure 2: Waterfront flicker test

I'm nearing the end of my compositing phase for the rough cut of my final project, which will be due in on March 31st.  Whilst the processing of the videos in Photoshop continues to be a strikingly long process, with the correct prep work and prioritising I have found ways to fit it in with the remaining schedule.  It's going to be particularly intensive considering I have one relatively simple but crucial fix to make in the Going Live animation by getting Nikko to move from Point A to Point B in a way that matches his walking speed.   After these composites, I will move on to editing the second version of my film, with a much shorter runtime, more auditory effects for better engagement, and more visual effects to hopefully gain a stronger understanding of where I want the film to go.  I am more than aware by now of the shots that will need redoing in order for the visual effects to be completely effective.

Figure 3: Bridge filter test

Figure 4: Waterside filter test


The purpose of the rough draft will be to make sure that the film is in a secure enough state with a strong narrative and flow.  It will need to have a much shorter runtime than before (which is definitely bogging down the first draft edit), and the VFX shots will need to be convincing enough to indicate that they can fully function, with or without professionally shot basis footage.  Whilst the film does have notable areas where it needs to be reshot, I have enough footage for a brief first draft.  For my next Premiere Pro project, I will put a cap at the five/six minute mark which will indicate the bare maximum runtime for the final draft.  Any other footage beyond that will result in unneccessarily crippling extra work that will bog down the narrative and just make the degree's final objective unachievable.  


Friday 17 March 2023

Advanced Production Update 17/03/23

 Advanced Production Update                                                                                                                     17/03/23

Figure 1: Video exporting from Photoshop

The latest attempt at visual effects for my final project has hit a bit of a hurdle.  I've tried experimenting with filters in photoshop to create the disorientation effect necessary for the connecting shots in my film, which will indicate the disconnection the protagonist is feeling from the world around him.  However, I've discovered a notable flaw in this process: the incredibly long export times.  Because of the information the videos contain and their file size, the rendering time on After Effects and Photoshop has ballooned considerably.  A 45 second shots with the effects added would result in a rendering process that could take upwards of 3 hours.  This could also increase the time necessary to encode the video in Premiere Pro.  The solutions around this issue mainly include doing some of the necessary cuts in Photoshop or After Effects to reduce the pressure on the software, as well as to make the final assembly cuts more efficient.  

Figure 2: Disorientation test

This is the latest test I've tried making in Photoshop.  The video itself took about 45 minutes to render and I suspect it will take even longer once it's put into After Effects for compositing with the original shot.  The flickering expression on the opacity keyframes is what seems to be slowly doing the rendering, but I'm sure that with enough experimentation this issue can be resolved.  If this can't be fully resolved, I will have to reserve long afternoons to have the videos be rendered without being disturbed.  

Figure 3: Flickering footage test

This is the latest compositing test I've tried in After Effects where the altered footage is combined with the original footage with colour correction to create a flickering, disconnection-like effect.  The footage took over an hour to process, even on a powerful computer used in the renderfarm, and so I will potentially have to leave the footage to render overnight.  The original intention with the modified footage and compositions was to process them as a full clip and then trim the footage down in Premiere Pro, but this may be unfeasible.  This process will definitely require a great deal of patience and accurate timing to make the application work with the timeframe we have left.

Shots to modify with sketch/painting filter: 
  • 01070028 (Tay Bridge stairwell)
  • 01070037 + 01120015 (Tay Riverside)
  • 0108001 (Under bridge shot)
  • 0109006 (West Ward Works)
  • 01090023 (Verdant Works)
  • 0107009 (Glasses shot, painting filter)
Figure 4: Longer flickering test


Thursday 16 March 2023

Advanced Production Update 16/03/23

 Advanced Production Update                                                                                                                     16/03/23

Figure 1: Pictish whale animation

I've just finished the first draft of the most difficult shot in my film so far, in terms of composition.  The effects of the video were not that hard to apply, despite the fact the CC light rays plugin seemed to be restricted to the borders of the composition, but the main challenge was getting the movement right.  Previously when I've had to create moving keyframes in my compositions, it's been relatively straightforward, as it was a case of moving the figure from Point A to Point B but with the Pictish whale effect, it's been a lot more challenging because I've had to use it on a panning shot where the priority is to keep the object more or less central.  This has also involved adding some three-dimensional movement where the object moves towards the camera to make it look larger in scale, and so far it's taken a lot of trial and error.  Whilst I can definitely say that the original live-action shot will not require any more reshooting considering it follows the rules set by the tutor, the draft shot will need a couple more takes to get a moving effect that feels right.  I suspect maybe using a null object will fix the problem of fluid movement, but there is nothing really in frame for a 3D motion tracker to latch onto and assist with.  

Figure 2: Pictish whale composite test

The shot itself is more or less OK because it's a sweeping shot, and is more interesting than the original handheld shot that only had a mild shake, albeit with some annoying glare from the sun.  There is also a wire on the end of the frame that I've used as a marker for a mask, and the trick to fix it is to time it more carefully with the flow of the shot, since the current version speeds up a bit towards the end.  I might need to speed up the animated footage slightly as well to make it the right speed, and to pick a motion path that is the right speed and the right flow.  This may well be the shot of the film that requires the most trial and error.


Wednesday 15 March 2023

Going Live update 15/03/23

Going Live update                                                                                                                                           15/03/23

Figure 1: Animating Nikko in Maya

I've currently moved onto animating Nikko in Maya whilst Tinny is currently still being rendered, and despite some periods where the process has been particularly stressful, the animation is becoming smoother and more refined.  Starting off, the feet proved to be particularly troublesome, mainly when it came to getting the positions just right in the midframe, but I've managed to find a workaround for this.  Despite the obviously much smaller proportions than the Kayla rig I've been using previously, I've managed to transfer the movements from the basic walk tutorial fairly well.  I'm moving onto the fine tuning section of the animation, and I do know that I will need to update the reference model in order to save time on animating again.  Thankfully this is a model that, for the most part, looks decent on almost every angle.

The adjustment of the animation in the graph editor will prove to be particularly tricky given how the movement has reacted to some tweaking in the past.  The first run through of the animation as a basic walk cycle has turned out smooth enough.  It may well need some more work when showed to my peers but hopefully it has still made the grade.

Figure 2: Nikko graph editor


Figure 3: Nikko walkcycle test

Figure 4: Nikko double-bounce graph

The double bounce walk for Nikko, adapted from the standard masculine walkcycle, usually requires slowing the animation cycle down from 24 frames to 33 frames so that the bounce is less sudden and jerky.  It also allows the viewer more time to observe the movement.  This is the method employed by the tutorial I've been following, and it's translated very successfully.

Figure 5: Double bounce walk cycle:https://www.youtube.com/watch?v=uTk3PYTTrJw

Figure 6: Double bounce walk cycle


Monday 13 March 2023

Advanced Production Update 13/03/23


 Advanced Production Update                                                                                                                 13/03/23

Figure 1: Pencil sketch filter: https://www.google.com/url?sa=i&url=https%3A%2F%2Fwww.photofunny.net%2Fcat-image-processing%2Fconvert-picture-drawing-a-pencil&psig=AOvVaw3YUnGBlVYIHP9_itKk_hPO&ust=1678809286950000&source=images&cd=vfe&ved=0CA8QjRxqFwoTCPiBsoui2f0CFQAAAAAdAAAAABAE

I've begun experimenting with some more pencil sketch filters and some new footage to create some more innovative shots.  The same criticism could easily apply to them in that the static footage is looking very unprofessional but that's been well established and with some well-staged reshoots this can be resolved.  I am aware that this technique might not be entirely relevant but I believe it can be classified as VFX.  The technique is accomplished by clearing up the footage in After Effects and then applying different filters and textures to them in Photoshop before taking them back to After Effects for final compositing and colour correcting.  The key to making this effect work is to make sure the animated footage is concentrated, so that the objects can be easily identified by the viewer.  

So far, only three or four shots have yet to make it to the first draft phase.  Once these shots have reached this stage, I can focus on narrowing down the final edit of my film.  I recognise that I need some extra screen recording footage for my assessment video as well as my showreel, so for my next compositing I'll have to make sure I've been recording video of it.  I will also need screen recording footage of me editing the rough cut of the final project to give evidence of my video editing knowledge.

Figure 2: Typewriter composite test

Shots that have reached the first draft phase: 
  • Typewriter test
  • Pictish beast
  • Pictish penguin
  • Pictish figure
  • Rotoscoped handjoin
  • Glasses filter
  • Pictish snake
  • Pictish boar
  • Pictish deer
  • Jute growing
  • Harp test
  • Lava
Shots that need to be composited/started:
  • Rotoscoped distortion
  • Flying whale
  • Rotoscoped vision
  • Alien landing
Things to make screen recording of:
  • Animating in Maya
  • Compositing 
  • Animating in TVPaint
  • Video editing


Friday 10 March 2023

Going Live Update 10/03/23

Going Live Update                                                                                                                                      10/03/23


Figure 1: Rendering tests

Prior to the next meeting with Wild Child, I've been experimenting with the Kayla rig in an attempt to make a more refined strut cycle.  In order to make the arm movements neater and more refined, I've decided that for the strut, it's better that the fists are closed because it shows that the character displays more confidence, as well as the arms being straight against the body to avoid bad arm manoeuvres when viewed from the front.  The lack of central poses in the strut cycle make the animation process harder than the vanilla walk cycle which had poses that were easier to map out.  The strut cycle has four poses between the start and middle and four poses between the middle and end meaning that whilst the waist position can be copied and pasted, there is no definitive pass pose yet, which makes it hard to make these sections fluent.  I must also confess that I've been doing the poses in the masculine style with a female character, mainly because the characters in our story are both male.

Figure 2: Homemade strut walk cycle

The double bounce walk cycle was made by simply adapting the standard walk cycle and replacing the up poses with down poses to make a bouncing effect, as well as by spreading out the cycle from 24 frames to 33 frames to make the animation slower and the bounce movement less sudden.  I've also found methods of animating the camera to perform an orbiting shot and other camera tricks.   This method will be perfect for Nikko, since this movement will easily match his persona, whilst the strut cycle we've agreed on for Tinny will be harder to pull off.   

Figure 3: Double bounce walkcycle

Figure 4: Maya Graph Editor: https://www.google.com/url?sa=i&url=https%3A%2F%2Fforums.autodesk.com%2Ft5%2Fmaya-animation-and-rigging%2Fonly-purple-curves-in-graph-editor%2Ftd-p%2F9559946&psig=AOvVaw1XNRtOeMbrkeB2ajCtpX9c&ust=1678534932018000&source=images&cd=vfe&ved=0CA8QjRxqFwoTCLCI7ISk0f0CFQAAAAAdAAAAABAE

I've also discovered how tricky the Maya graph editor is.  Whilst it is essential to master, the curves on it do require a lot of patience and care other wise the movements can become erratic.  I'm going to have to learn Maya for many years to fully avoid these sorts of shenanigans. The main trick is to make the tangents flow into each other organically whilst keeping an eye on the figure movement. The main problem child I've found with the Kayla rig at the moment is the right arm which is getting obnoxious and hard to fully control.  I really need a tutor overview to get this sort of thing ironed out.

Figure 5: Strut compilation


Tuesday 7 March 2023

Advanced Production Update 07/03/23

 Advanced Production Update                                                                                                                      07/03/23

Figure 1: Salmon composite test

This is the latest test of VFX composition with my salmon animation, using a low angle shot of a bridge beam as the basis.  The animation was adapted from a royalty free model I found online which I adapted into a Pictish salmon.  I think this one turned out better than the first attempt because it had a longer body which was closer to the Pictish symbol, and a flow of plausible movement that could be turned into a GIF-like cycle that made animating smoother and more efficient.  I also found it easier to incorporate the animation into the composition with flowing, graffiti-like staging and a relatively simple way of getting the angle right to make it look like it's been painted on the beam.  I've also added some simple little bubbles on either side of the composition to add some underwater theming to the shot, as well as the necessary glowing on the fish to make them distinct from reality.  Whilst the original shot needs to be reshot to add the necessary movement on the camerawork, the VFX should require minimal alteration at best.

I've also been experimenting with some pencil sketch filters on my rotoscope videos, since whilst they look less rustic and personal than my usual method, they can produce more refined results and can be infinitely more efficient.  The main thing I've found is that they generally work better when they are filmed on a green screen, because you still need to rotobrush the footage in after effects to keep the video focused.   I've tried applying video filters in photoshop to the footage to make it resemble an outline done on a sketch, and whilst the results can be very precise, it also picks up everything in the background.  It should also allow more time to work on the compositing and reshooting the original shot if needed.  This is an occasion where static shots to be rotoscoped work better because the constant movement in frame can make it harder to rotobrush.

Figure 2: Pencil sketch filter test

This is the latest pencil sketch attempt I've tried on Photoshop where I took the footage and ran it through a tutorial designed for an image.  Whilst there were inevitably points where the functions were clearly designed for a still image, and when I compressed layers they were just turned into one still, most of the functions and filters seemed to work essentially as they did in the tutorial.  The main challenge at this point is to find a video that has minimal background interference.  I will continue to experiment with different filters and methods since this is proven to be an efficient method.  


Monday 6 March 2023

Advanced production update 06/03/23

Advanced production update                                                                                                                      06/03/23

Figure 1: Caird Hall: https://en.wikipedia.org/wiki/Caird_Hall

I've just finished the first composition test of the Caird Hall shot with a roto-brush effect so that I can have a figure of myself walking on top of animation.  The composition needs some improving for the second draft, including the incorporation of the double discs and a glow effect to amplify the animation's distinction.  I've found that the rotobrush makes it a bit harder for the computer to render footage whenever you add new effects, but this is something that isn't a major gripe.  The bezier warp effect makes the effect on the animation blend into the background fairly effectively.

Figure 2: Harp composition test

I'm also currently developing my Pictish beast composition with shot from around West Ward Works.  I've applied some royalty free footage of some mist to try and add some more atmosphere to the shot, and used 3D to make the Pictish beast appear as though it's flowing in and out of the buildings.  I initially tried using a divide filter on the animation, but that made the glow effects behave weirdly, so I had to apply the invert filter to make the glowing filter work properly.  The next draft of the video will definitely require some better timing on the animation, with maybe some more frames in the TVPaint file so that it can appear to flow better.  This is one of many shots that will need to be redone with a moving shot so I can move on.  Overall, I am happy with how this shot has turned out, but I recognise that it might have some issues to iron out.  This shot also needs some glowing lines to indicate the impact point where the beast hits the wall and passes through.
 
Figure 3: Pictish beast composition test


Shots that have reached the first draft phase:
  • Pictish figure
  • Pictish penguin
  • Pictish beast
  • Hand joining
  • Deer animation
  • Lava
  • Pictish snake
  • Boar running
  • Glasses filter
  • Jute growing
  • Harp playing
Shots that need to be started/finished:
  • Pictish salmon
  • Rotoscope distortion
  • Rotoscoped vision
  • Jute machine rotoscope
  • Whale flying overhead
  • Typewriter rotoscope

Figure 4: After Effects Pictish beast composition


Final blog of degree 26/7/23

 Final blog of degree                                                                                                                       ...